Luxury vinyl plank (LVP) flooring has taken the home design world by storm, offering a perfect blend of elegance, durability, and affordability. With its realistic wood-like appearance, water resistance, and low maintenance, LVP is a top choice for homeowners looking to elevate their interiors. Installing LVP flooring is a manageable DIY project or a straightforward job for professionals, but it requires careful planning and execution to achieve a flawless finish. In this comprehensive guide, we’ll walk you through the unique aspects of Luxury vinyl plank installation, share expert tips, and reveal creative techniques to make your flooring project stand out. Whether you’re refreshing a single room or transforming your entire home, this blog will equip you with the knowledge to create a stunning, long-lasting floor.
Why Choose Luxury Vinyl Plank Flooring?
Before diving into the installation process, let’s explore why Luxury vinyl plank is a game-changer. Unlike traditional hardwood, LVP is made from multiple layers of PVC, designed to mimic the look and texture of natural wood or stone. Its unique advantages include:
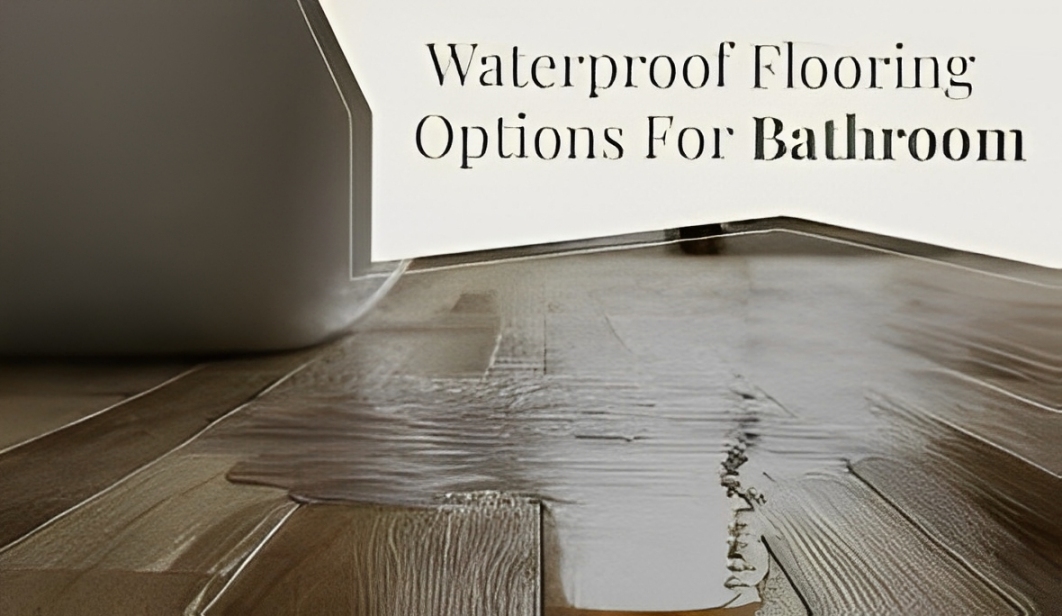
- Waterproof Durability: Perfect for kitchens, bathrooms, and basements.
- Aesthetic Versatility: Available in countless designs, from rustic oak to sleek slate.
- Comfort and Quiet: Softer underfoot and less noisy than hardwood or tile.
- Budget-Friendly: High-end look at a fraction of the cost of premium materials.
- Low Maintenance: Easy to clean with minimal upkeep.
LVP’s click-lock or glue-down installation systems make it accessible for DIY enthusiasts, while its resilience suits high-traffic areas, making it ideal for families, pet owners, and busy households.
You can read this blog also :- https://tidyuphome.com/rain-gutter/
Tools and Materials: Setting the Stage for Success
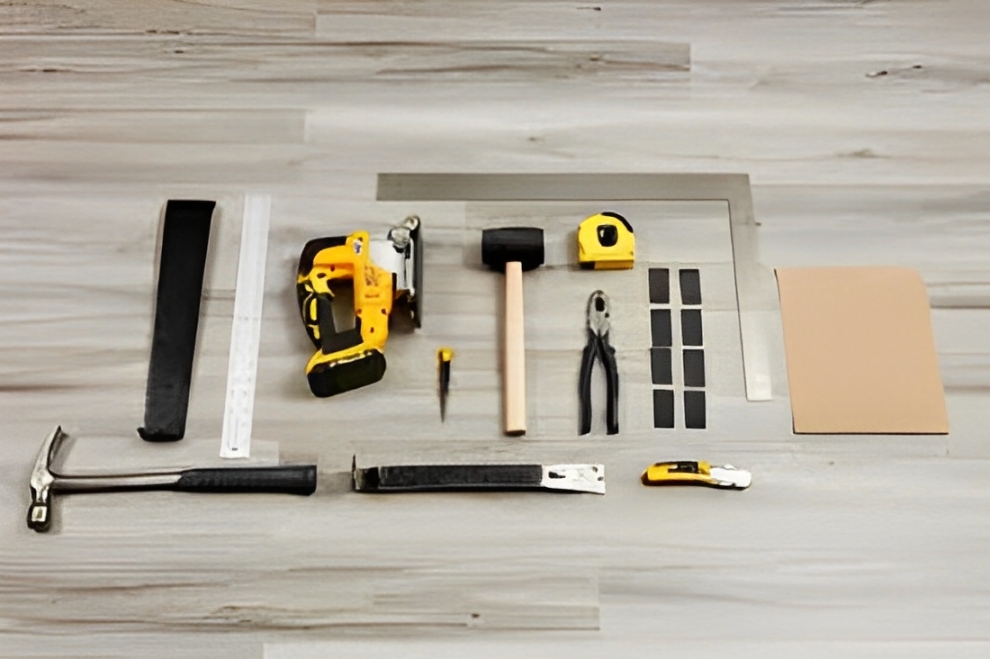
To install Luxury vinyl plank flooring like a pro, gather these essential tools and materials:
- Luxury vinyl plank Flooring: Calculate your square footage and add 10% for waste.
- Underlayment: Optional, but it enhances soundproofing and comfort.
- Utility Knife or Vinyl Cutter: For precise cuts.
- Measuring Tape and Straightedge: For accurate measurements.
- Tapping Block and Rubber Mallet: For click-lock systems.
- Spacers: To maintain expansion gaps.
- Leveling Compound: For uneven subfloors.
- Cleaning Supplies: To prep the subfloor.
- Safety Gear: Knee pads, gloves, and safety glasses.
Pro tip: Choose Luxury vinyl plank with a thick wear layer (12-20 mils) for better durability, especially in high-traffic areas. Also, consider eco-friendly options made from recycled materials for a sustainable choice.
Step 1: Preparing the Subfloor – The Foundation of Flawless Flooring
A smooth, clean, and level subfloor is critical for a seamless Luxury vinyl plank installation. Here’s how to prepare:
- Remove Old Flooring: Strip away carpet, tiles, or old vinyl. Ensure no adhesive residue remains.
- Clean Thoroughly: Vacuum and mop to eliminate dust and debris.
- Check for Levelness: Use a level to identify dips or high spots. Apply leveling compound to low areas and sand down high spots.
- Acclimate the Planks: Let your LVP sit in the room for 48 hours to adjust to the temperature and humidity, preventing expansion or contraction issues later.
Unique Tip: Create a “subfloor map” by sketching out any imperfections or obstacles (like vents or pipes). This helps you plan cuts and layouts in advance, saving time during installation.
Step 2: Planning the Layout – Designing Your Masterpiece
The layout of your Luxury vinyl plank flooring can make or break the aesthetic of your space. Follow these steps for a visually appealing design:
- Choose a Direction: Align planks with the room’s longest wall or the primary light source for a natural flow.
- Stagger the Seams: Offset plank ends by at least 6 inches for a random, authentic wood look.
- Dry Lay First: Arrange a few rows without adhesive or clicking to visualize the pattern and check for fit.
- Plan for Obstacles: Measure around doorways, vents, and corners to ensure precise cuts.
Creative Idea: For a unique twist, try a herringbone or chevron pattern with Luxury vinyl plank planks. These designs add sophistication and can be achieved with careful planning and angled cuts, setting your floor apart from standard layouts.
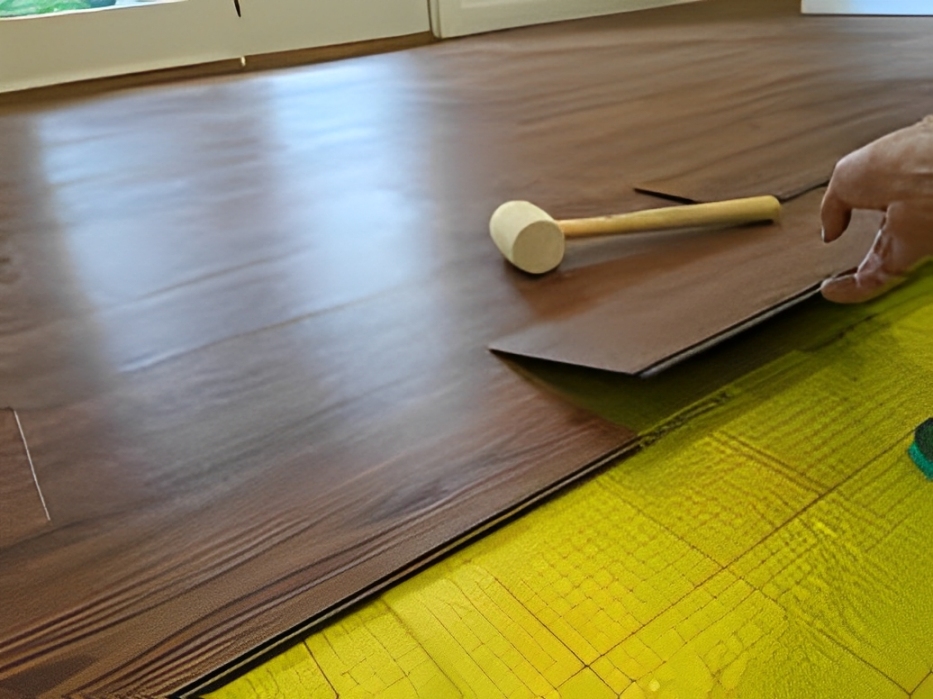
Step 3: Installing the First Row – Starting Strong
The first row sets the tone for the entire installation. Here’s how to nail it:
- Start in a Corner: Begin in the left corner of the longest wall, placing spacers (1/4 inch) between the planks and the wall to allow for expansion.
- Click or Glue: For click-lock systems, angle the planks and snap them together. For glue-down Luxury vinyl plank, apply adhesive evenly and press firmly.
- Cut with Precision: Use a utility knife or vinyl cutter to trim planks for a snug fit at the end of the row.
Pro Tip: If your walls aren’t perfectly straight, scribe the first row by cutting planks to follow the wall’s contour. This ensures a polished look and minimizes gaps.
Step 4: Building Out the Floor – Patience Pays Off
Continue laying planks row by row, maintaining a staggered pattern. For click-lock systems, tap gently with a rubber mallet to secure connections without damaging the edges. For glue-down installations, work in small sections to keep adhesive from drying out.
Unique Technique: Use a “pull bar” for tight spaces near walls. This tool helps you lock planks together in areas where a mallet won’t fit, ensuring a seamless fit in tricky spots.
Step 5: Cutting Around Obstacles – Precision and Creativity
Doorways, vents, and columns require careful cuts. Here’s how to handle them:
- Measure Twice, Cut Once: Create cardboard templates for complex shapes like curved archways.
- Use a Jigsaw or Vinyl Cutter: These tools are ideal for intricate cuts.
- Leave Expansion Gaps: Maintain a 1/4-inch gap around fixed objects to allow for movement.
Creative Hack: For a decorative touch, consider adding a contrasting border around obstacles like fireplace hearths or kitchen islands. Use Luxury vinyl plank in a complementary color or texture to create a custom inlay effect.
Step 6: Finishing Touches – Polishing Your Work of Art
Once all planks are installed, it’s time to complete the project:
- Install Transition Strips: Use T-molding or reducers for doorways and room transitions.
- Attach Baseboards or Quarter-Round: Cover expansion gaps with trim for a clean look.
- Clean the Floor: Sweep and mop with a gentle cleaner to remove installation dust.
Unique Finishing Idea: Apply a thin bead of clear silicone caulk along baseboards in moisture-prone areas (like bathrooms) to create a watertight seal without compromising the expansion gap.
Maintenance Tips for Long-Lasting Beauty
LVP flooring is low-maintenance, but these tips will keep it looking pristine:
- Sweep Regularly: Prevent scratches by removing dirt and grit.
- Use Felt Pads: Place them under furniture to avoid dents.
- Avoid Harsh Chemicals: Stick to pH-neutral cleaners designed for vinyl.
- Rug It Up: Add area rugs in high-traffic zones to reduce wear.
Eco-Friendly Tip: Use a steam mop with a low-heat setting for deep cleaning. It’s effective, chemical-free, and environmentally friendly.
Common Pitfalls and How to Avoid Them
Even seasoned DIYers can make mistakes. Here’s how to steer clear of common issues:
- Uneven Subfloor: Always level the subfloor to prevent planks from shifting or clicking.
- Improper Acclimation: Don’t skip the 48-hour acclimation period to avoid expansion gaps.
- Poor Seam Alignment: Double-check stagger patterns to maintain a natural look.
- Incorrect Adhesive: For glue-down Luxury vinyl plank, use manufacturer-recommended adhesives to ensure a strong bond.
The Wow Factor: Customizing Your LVP Installation
To make your LVP floor truly unique, consider these creative ideas:
- Mixed Textures: Combine wood-look and stone-look LVP for a dynamic contrast.
- Inlaid Patterns: Incorporate geometric designs or borders for an artistic flair.
- Color Play: Use light and dark planks to create zones within an open-plan space.
Final Thoughts: Your Dream Floor Awaits
Installing luxury vinyl plank flooring is an exciting opportunity to transform your home with style and functionality. By carefully preparing your subfloor, planning a stunning layout, and executing precise cuts, you’ll achieve a professional-quality result that enhances your space for years to come. Whether you’re a DIY enthusiast or hiring a pro, this guide provides the knowledge and inspiration to make your LVP installation a masterpiece. So, roll up your sleeves, unleash your creativity, and enjoy the satisfaction of a beautifully installed floor